Do you have all the parts needed for your chainsaw? Now you can start assembling it. Please ensure you are wearing protective gloves, including every time you are in contact with the chain.
Chain quick tensioning
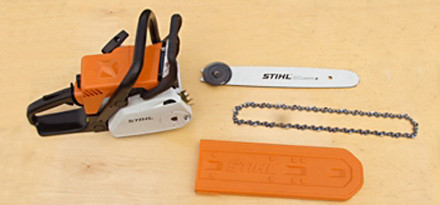
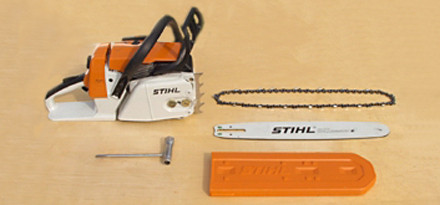
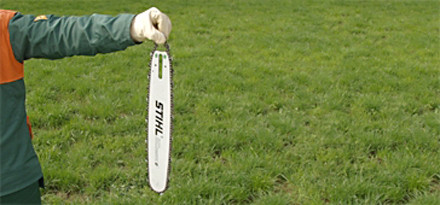
Step 1 Lay the individual components (engine, chain and guide bar) on a suitable, clean, flat work surface. You may wish to place some soft material (e.g. carpet) underneath to avoid any damage to the machine or the floor.
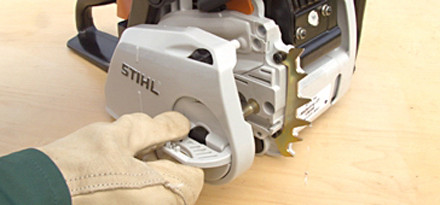
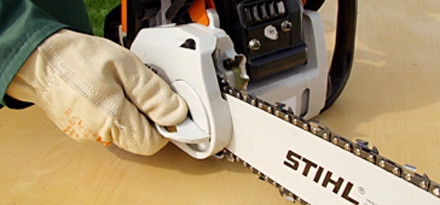
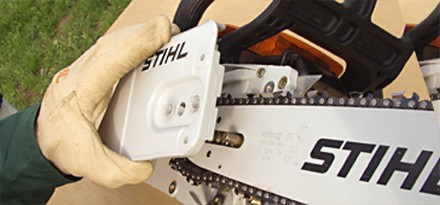
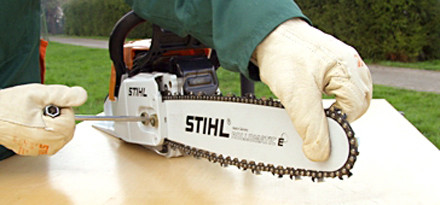
Step 2 To remove the chain sprocket cover, open the wing nut and turn fully anti-clockwise.

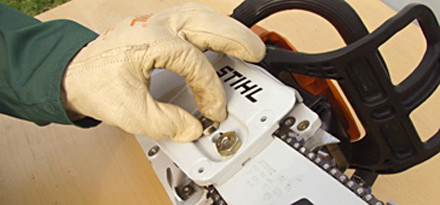
Step 3 Turn the adjusting wheel mounted on the bar clockwise as far as it will go.
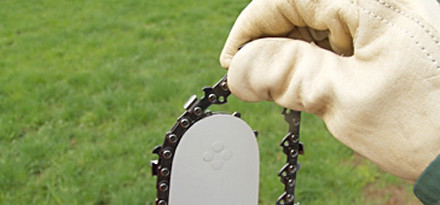
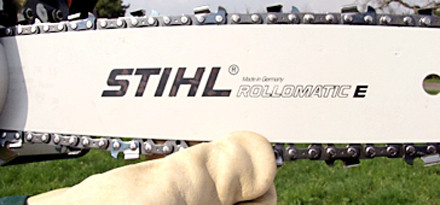
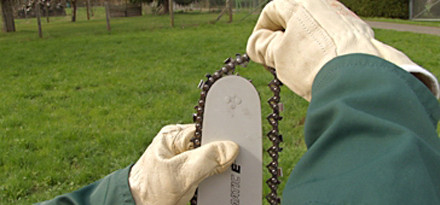
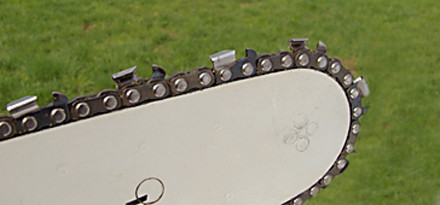
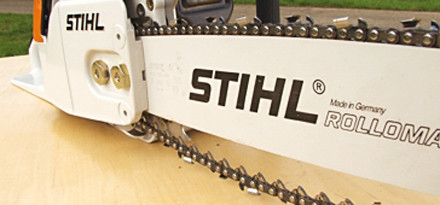
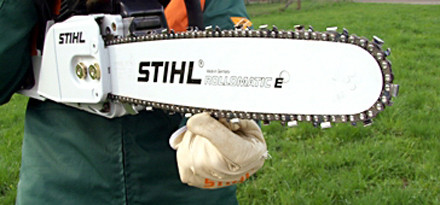
Step 4 Always wear gloves when working on the chain because of the high risk of injury from the sharp teeth. Start by picking up the chain and guide bar and route the chain around the guide bar, starting at the bar nose. Make sure that the chain is running in the correct direction => (refer to picture).
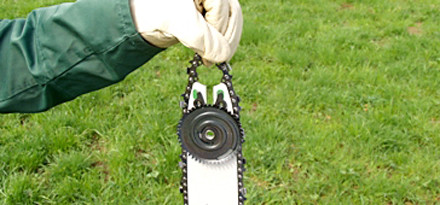
Step 5 Then turn the chain round until the bar is lying completely inside the chain.

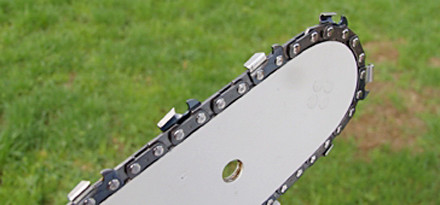
Step 6 Check again that the chain is correctly positioned on the guide bar and is pointing in the correct direction. The cutter should be on top of the bar and pointing forwards.

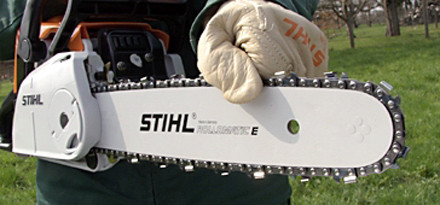
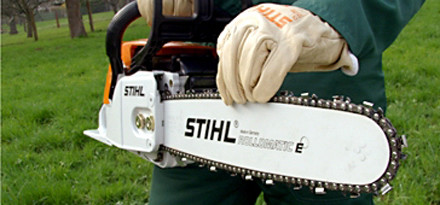
Step 7 Now pick up the chain and guide bar assembly and route the chain round the sprocket. Slide the guide bar over the mounting stud.
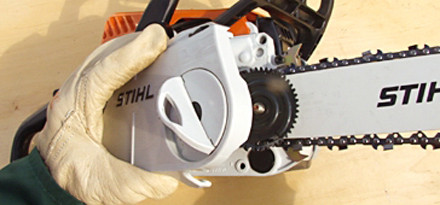
Step 8 Replace the sprocket cover on the engine, inserting all the lugs into the holes provided.
Step 9 Turn the wing nut until the sprocket cover butts against the engine housing. Do not tighten the sprocket cover fully yet.
Step 10 Turn the adjusting screw forward (toward the bar nose). The chain drive links should engage in the bar groove.
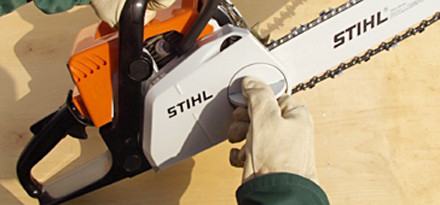
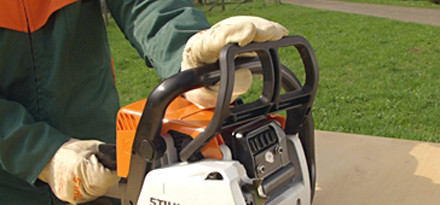
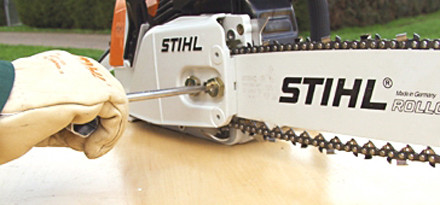
Step 11 Now tighten up the wing nuts. Close down the wing nut until flush and the locking pins are fully engaged with the chain sprocket cover.
Step 12 Make a visual inspection of your machine to check that the chain is engaged with the bar groove and is not sagging.
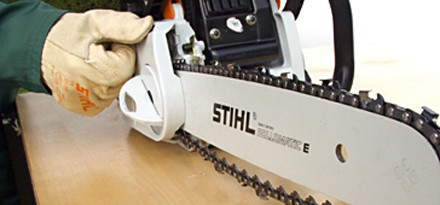
Step 13 Then check that you have not overtightened the chain. Pull the chain by hand in the direction of rotation (first release the chain brake, otherwise it will not turn). It is essential to wear work gloves when doing this, to avoid the risk of injury from contact with the sharp chain. If the chain will not move, undo the wing nut and repeat the previous steps.
Step 14 Your chainsaw is now fully assembled. Now activate the chain brake again.
Chain Side Tensioning
Step 1 Lay the individual components (engine, chain, guide bar, combination wrench) on a suitable, clean, flat work surface. You may wish to place some soft material (e.g. carpet) underneath to avoid any damage to the machine or the floor.
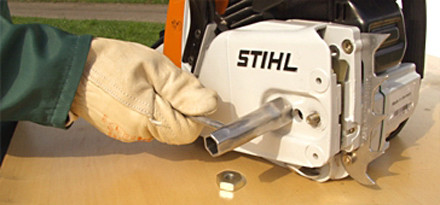
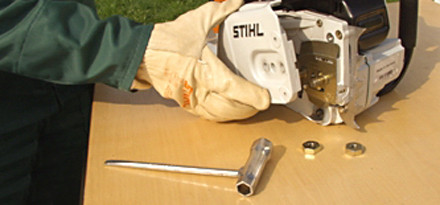
Step 2 Place the power head in an upright position and remove the nuts with the combination wrench. Then remove the chain sprocket cover.
Step 3 Turn the chain tensioner to the rear (anti-clockwise) so that the tensioner slide butts against the housing slot (toward the chain sprocket).
Step 4 Always wear gloves when working on the chain because of the high risk of injury from the sharp teeth. Start by picking up the chain and guide bar and route the chain around the guide bar, starting at the bar nose. Make sure that the chain is running in the correct direction => (refer to picture).
Step 5 Then turn the chain round until the bar is lying completely inside the chain.

Step 6 Check again that the chain is correctly positioned on the guide bar and is pointing in the correct direction. The cutter should be on top of the bar and pointing forwards.
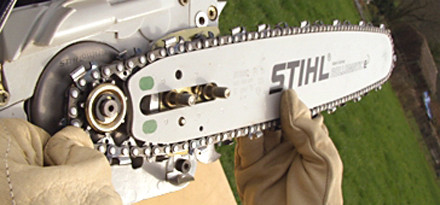
Step 7 Now pick up the chain and guide bar assembly and route the chain round the sprocket. Push the guide bar over the mounting studs and the tensioner slide and into the hole provided.
Step 8 Replace the sprocket cover on the engine unit and tighten both nuts hand-tight. This prevents the bar and chain from slipping, allowing you to safely adjust the chain tension.
Step 9 The chain is now loose and sags. This can be seen because the chain drive links are not engaging in the bar groove.
Step 10 Now tighten up the tensioning screw until there is very little chain sag on the underside of the bar and the drive link tangs engage in the bar groove.
Step 11 Now raise the bar nose and turn the chain tensioning screw a bit more. The drive links should engage in the bar groove.

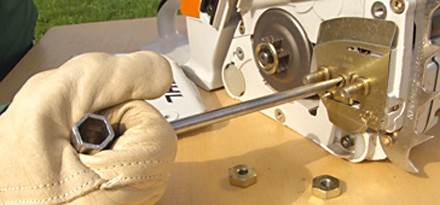
Step 12 Now tighten the mounting nuts firmly with the combination wrench.
Step 13 Make a visual inspection of your machine to check that the chain is engaged with the bar groove and is not sagging.
Step 14 Then check that you have not overtightened the chain. Pull the chain by hand in the direction of rotation (first release the chain brake as otherwise it will not turn). It is essential to wear work gloves when doing this, to avoid the risk of injury from contact with the sharp chain. If the chain will not move, slacken the nuts and repeat the previous steps.
Step 15 Your chainsaw is now fully assembled. Now activate the chain brake again.